How to Delete hyberfil.sys and Free Up Space on Your PC: If you’ve ever found your computer running low on storage space, one culprit might be a mysterious file called “hyberfil.sys.” This file can consume a significant amount of disk space over time. In this article, we’ll explain what hyberfil.sys is, why it exists, and most importantly, how to safely delete it to reclaim valuable storage on your PC. But before then let’s quickly look at what Hyberfil.sys mean.
What is hyberfil.sys?
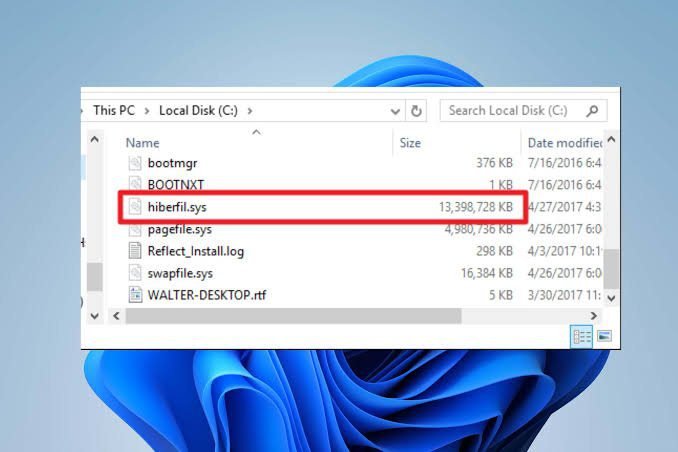
Hyberfil.sys, is a short for “hibernation file system,” is a crucial system file in Windows operating systems. It plays a vital role in the hibernation feature, which allows your computer to save its current state and quickly resume where you left off your computer when you power it back on. This file is created when you enable the hibernation feature on your PC.


Why should you consider deleting hyberfil.sys?
While hibernation can be useful, not everyone uses it regularly. Moreover, hiberfil.sys can occupy a substantial amount of disk space, especially on systems with large RAM. If you’re struggling with limited storage space on your PC and rarely use hibernation, deleting hyberfil.sys can be a smart move to free up valuable gigabytes.
How to safely delete hyberfil.sys
Before you start, remember that hyberfil.sys is a system file, and tampering with it requires administrator privileges. Follow these steps carefully to be able to delete hyberfil.sys.
1. Open the Command Prompt as an administrator:
- – Press the Windows key.
- – Type “cmd” or “Command Prompt” in the search bar.
- – Right-click on “Command Prompt” and select “Run as administrator.”
2. Disable hibernation:
- – In the Command Prompt window, type “powercfg.exe /hibernate off” and press Enter.
- – This command disables the hibernation feature and deletes the hyberfil.sys file.
3. Restart your computer:
- – Type “shutdown /r” in the Command Prompt and press Enter.
- – Your PC will restart without hibernation enabled.
4. Verify deletion:
- – After the restart, navigate to your system drive (usually C:).
- – Check if the hyberfil.sys file is no longer present. If it’s gone, you’ve successfully deleted it.
The above is a general way of deleting hyberfil.sys on your computer, now let’s see how you can do that in various windows version, from windows 10 to windows Vista.
How to Delete hiberfil.sys on Windows 10
If you find yourself seldom using the Hibernate feature on your Windows 10 PC and need to free up valuable disk space, you can easily delete the hiberfil.sys file. This step-by-step guide will walk you through the process, ensuring a seamless removal of this space-consuming file.
Deleting hiberfil.sys: A Step-by-Step Guide
Step 1: Open an Elevated Command Prompt
To begin, you’ll need to access the Command Prompt with administrator privileges. The method for doing this may vary depending on your version of Windows 10.
For Windows 10 Home Edition
- 1. Click on the “Search” icon in your taskbar.
- 2. Type “command” into the search bar.
- 3. Right-click on “Command Prompt” when it appears as the primary result.
- 4. Select “Run as Administrator” from the context menu.
- 5. If a User Account Control window pops up, click “Yes” to grant permission.
For Windows 10 Pro and higher
- 1. Press the “Windows” key on your keyboard.
- 2. Type “command.”
- 3. Right-click on “Command Prompt” when it appears in the search results.
- 4. Choose “Run as Administrator” from the options.
Step 2: Disable Hibernate
Once you’ve opened an Elevated Command Prompt, follow these steps:
1. In the Command Prompt window, type the following command and press Enter:
“`
powercfg.exe /hibernate off
“`
2. You’ll receive a confirmation message indicating that hibernation has been disabled.
Step 3: Close the Command Prompt
With hibernation disabled, it’s time to close the Command Prompt. Simply type “exit” and press Enter, or click the “X” button in the top-right corner of the Command Prompt window.
How to Delete hiberfil.sys on Windows 8
If you’re using Windows 8 and rarely make use of the Hibernate feature, you may want to consider deleting the hiberfil.sys file to reclaim valuable disk space. This simple guide will walk you through the steps to disable Hibernate and remove hiberfil.sys from your system.
Step 1: Open an Elevated Command Prompt
1. To begin, you’ll need to access the Elevated Command Prompt, which grants you the necessary administrator privileges. Follow these steps:
- Press and hold the Windows Key: Located on your keyboard, hold down the Windows Key.
- Press X: While holding the Windows Key, press the X key. This action opens the Power Users Tasks menu.
2. From the Power Users Tasks menu, select “Command Prompt (Admin).” If a User Account Control (UAC) window appears requesting permission, click “Yes.” This will open the Command Prompt window with administrative privileges.
Step 2: Disable Hibernate
1. In the Command Prompt window with administrative privileges, enter the following command:
“`
powercfg.exe /hibernate off
“`
2. After typing the command, press the Enter key. You’ll receive a confirmation message indicating that hibernation has been successfully disabled.
Step 3: Close the Command Prompt
Now that hibernation is disabled and the hiberfil.sys file is no longer needed, you can close the Command Prompt. You can do this by typing “exit” and pressing Enter or clicking the “X” button in the top-right corner of the Command Prompt window.
How to Delete hiberfil.sys on Windows 7
If you’re using Windows 7 and find yourself rarely using the Hibernate feature, you can regain precious disk space by deleting the hiberfil.sys file. This guide will walk you through the process step by step, ensuring a hassle-free removal of this space-consuming file.
Step 1: Open an Elevated Command Prompt
1. To begin, you’ll need to access the Elevated Command Prompt, granting you the necessary administrator privileges. Follow these simple steps:
Select Start: Click on the “Start” button in the bottom-left corner of your screen.
Enter cmd into the Search Box: Type “cmd” into the Search box, but do not press Enter yet. You will see Command Prompt listed as the primary result in the Search menu.
2. Now, here’s a keyboard shortcut that opens Command Prompt with admin privileges:
Press Ctrl + Shift + Enter: While holding down the Ctrl and Shift keys, press Enter. This action opens the Command Prompt with administrative rights.
3. If a User Account Control (UAC) prompt appears requesting permission, simply select “Yes” to continue. The Command Prompt window will open with administrator privileges.
Step 2: Disable Hibernate
1. In the Command Prompt window with administrative privileges, enter the following command:
“`
powercfg.exe /hibernate off
“`
2. After typing the command, press the Enter key. You’ll receive a confirmation message indicating that hibernation has been successfully disabled.
Step 3: Close the Command Prompt
With hibernation disabled and hiberfil.sys no longer needed, it’s time to close the Command Prompt. You can do this by simply typing “exit” and pressing Enter or by clicking the “X” button in the top-right corner of the Command Prompt window.
How to Delete hiberfil.sys on Windows Vista
If you’re using Windows Vista and seldom use the Hibernate feature, you can regain valuable disk space by deleting the hiberfil.sys file. This guide will walk you through the process step by step, making it a breeze to remove this space-consuming file.
Step 1: Access Command Prompt with Administrator Privileges
1. To begin, you’ll need to access Command Prompt with administrator privileges. Here’s how:
- Select Start: Click on the “Start” button in the bottom-left corner of your screen.
- Access All Programs: From the Start menu, select “All Programs.”
- Choose Accessories: Within the “All Programs” menu, locate “Accessories.”
2. Next, right-click on “Command Prompt” in the list of options, and then choose “Run as Administrator.” This action will open Command Prompt with the necessary administrative rights.
Step 2: Disable Hibernate
1. In the Command Prompt window with administrative privileges, enter the following command:
“`
powercfg.exe /hibernate off
“`
2. After typing the command, press the Enter key. You’ll receive a confirmation message indicating that hibernation has been successfully disabled.
Step 3: Close the Command Prompt
With hibernation disabled and hiberfil.sys no longer needed, it’s time to close the Command Prompt. You can do this by simply typing “exit” and pressing Enter or by clicking the “X” button in the top-right corner of the Command Prompt window.
Conclusion
By following these simple steps, you can reclaim valuable storage space on your PC by deleting the hyberfil.sys file. This can be especially helpful if you rarely use the hibernation feature. However, if you decide to use hibernation again in the future, you can re-enable it by following a similar process in the Command Prompt. Remember to always exercise caution when making changes to system files and to back up your important data regularly.